iOS Imaging on the Cheap! - Part Deux! (for iOS 10 & 11)

We got some fantastic gifts of jailbreaks over the holiday so naturally I get very excited and dove right in so I can start getting back into research for iOS 10.3+ and iOS 11. The first step in this research is getting physical access to the device and capturing data. For some background please refer to my previous article on this: iOS Imaging on the Cheap!

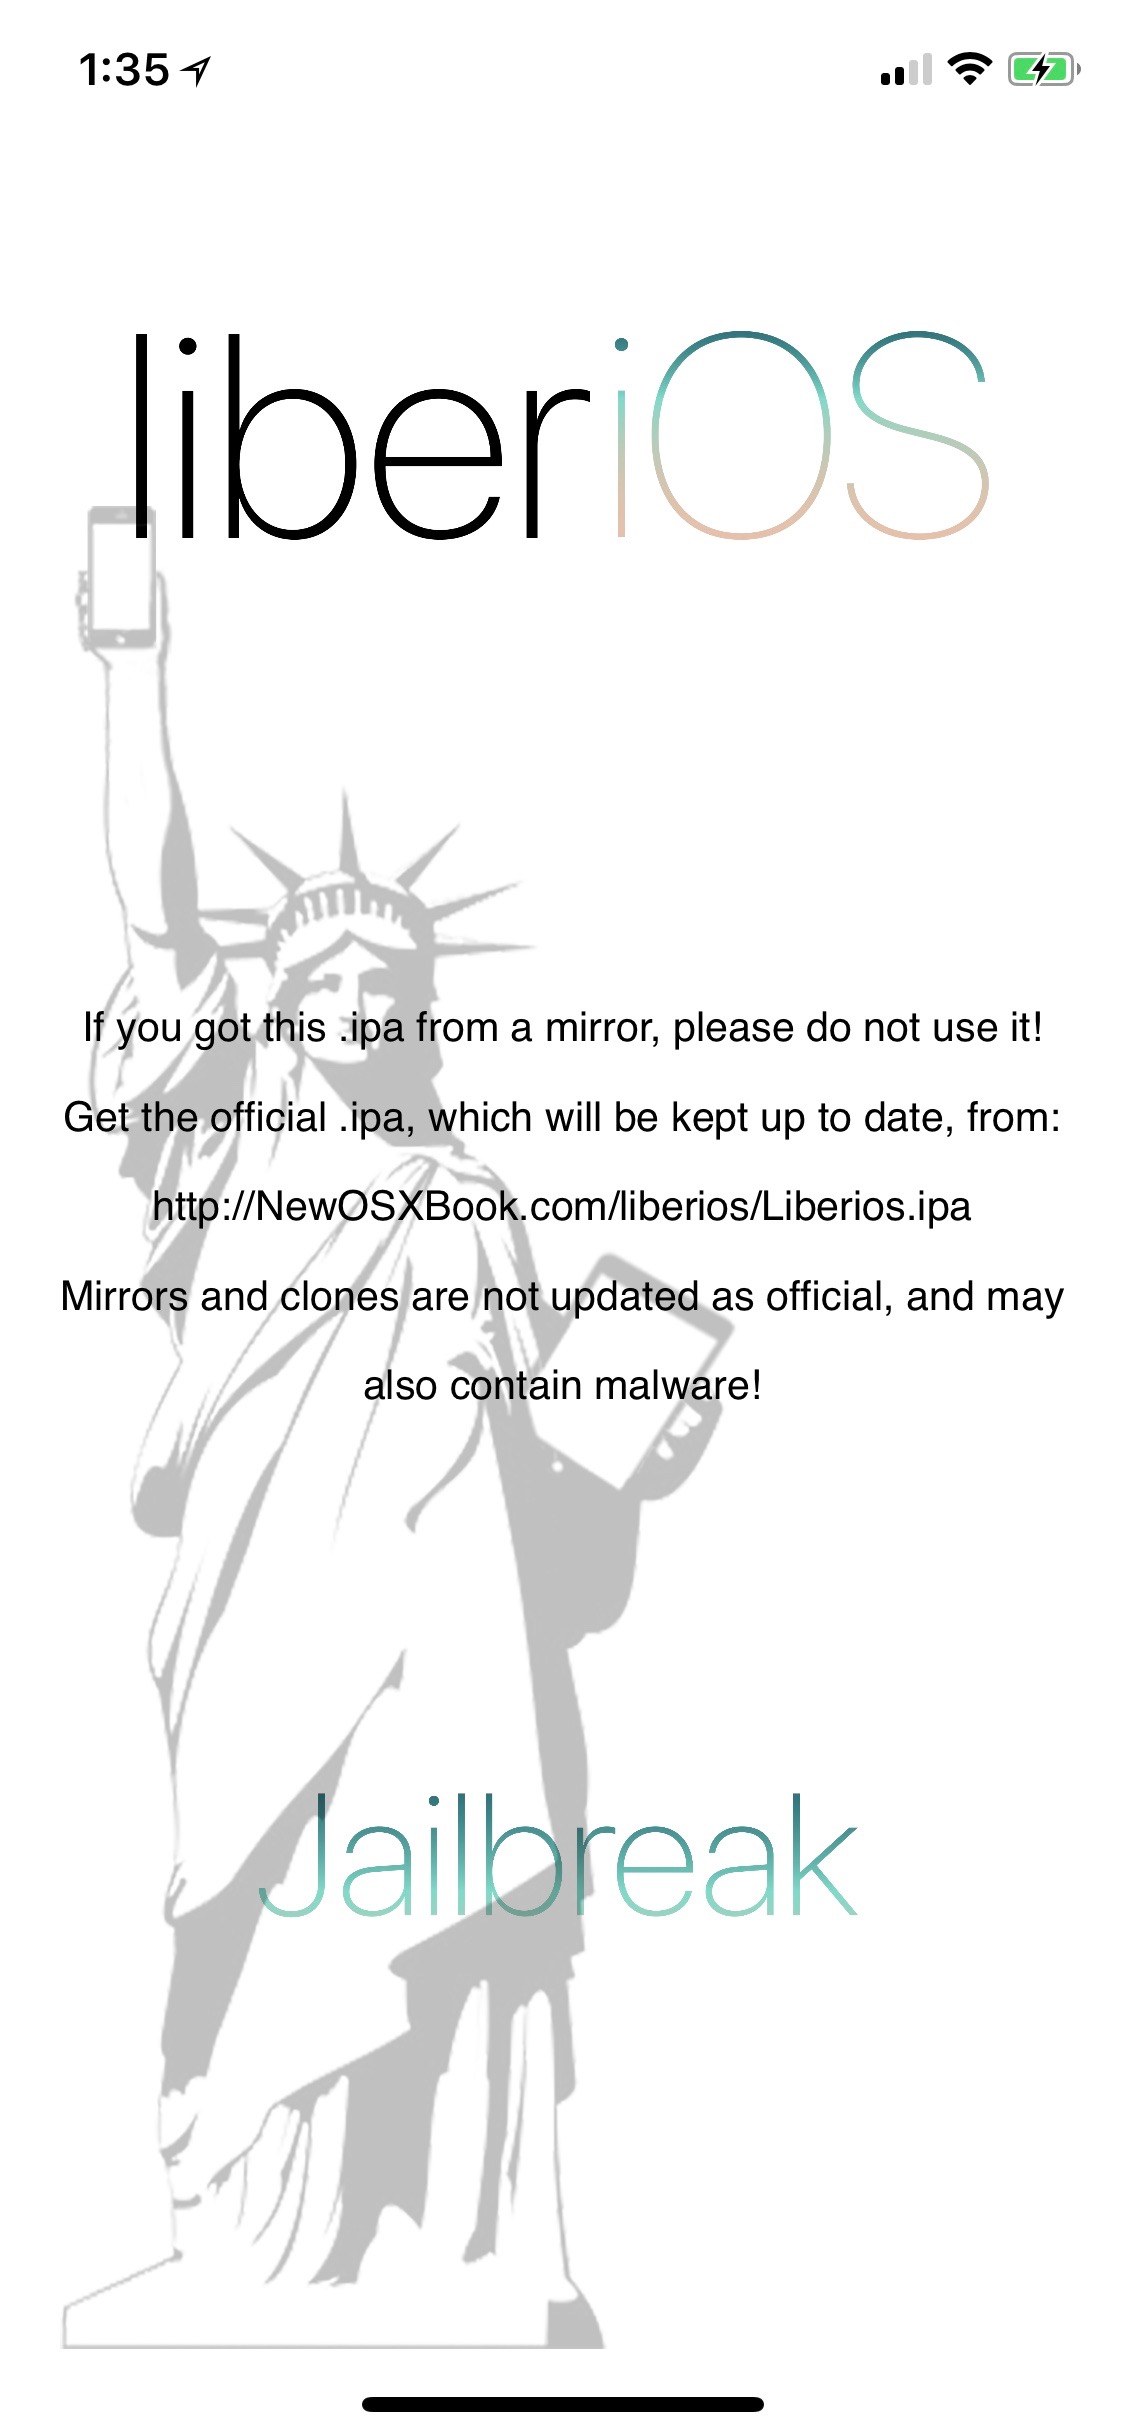
This article will include the jailbreaks for iOS 10.3.3 using Meridian and iOS 11 using LiberiOS. My go to for all jailbreaks is The iPhone Wiki. Always, always, always make sure you go to the legitimate jailbreak host to ensure non-compromised jailbreak software. These two jailbreaks are semi-tethered jailbreaks meaning they revert the devices to non-jailbroken status when the devices are rebooted. Both of these jailbreaks are apps that run on the device thus you will be downloading an IPA file and installing them via Cydia Impactor. Quick instructions are the following, feel free to search for more detailed instructions - they are all over the place:

  • Download IPA

  • Plug in the device

  • Drag & Drop onto Cydia Impactor

  • Input Apple ID email & password (you may need to generate an app specific password if you have two-factor turned on).

  • Install will do its thing, depending on you developer status you may need to trust the app developer in Settings.

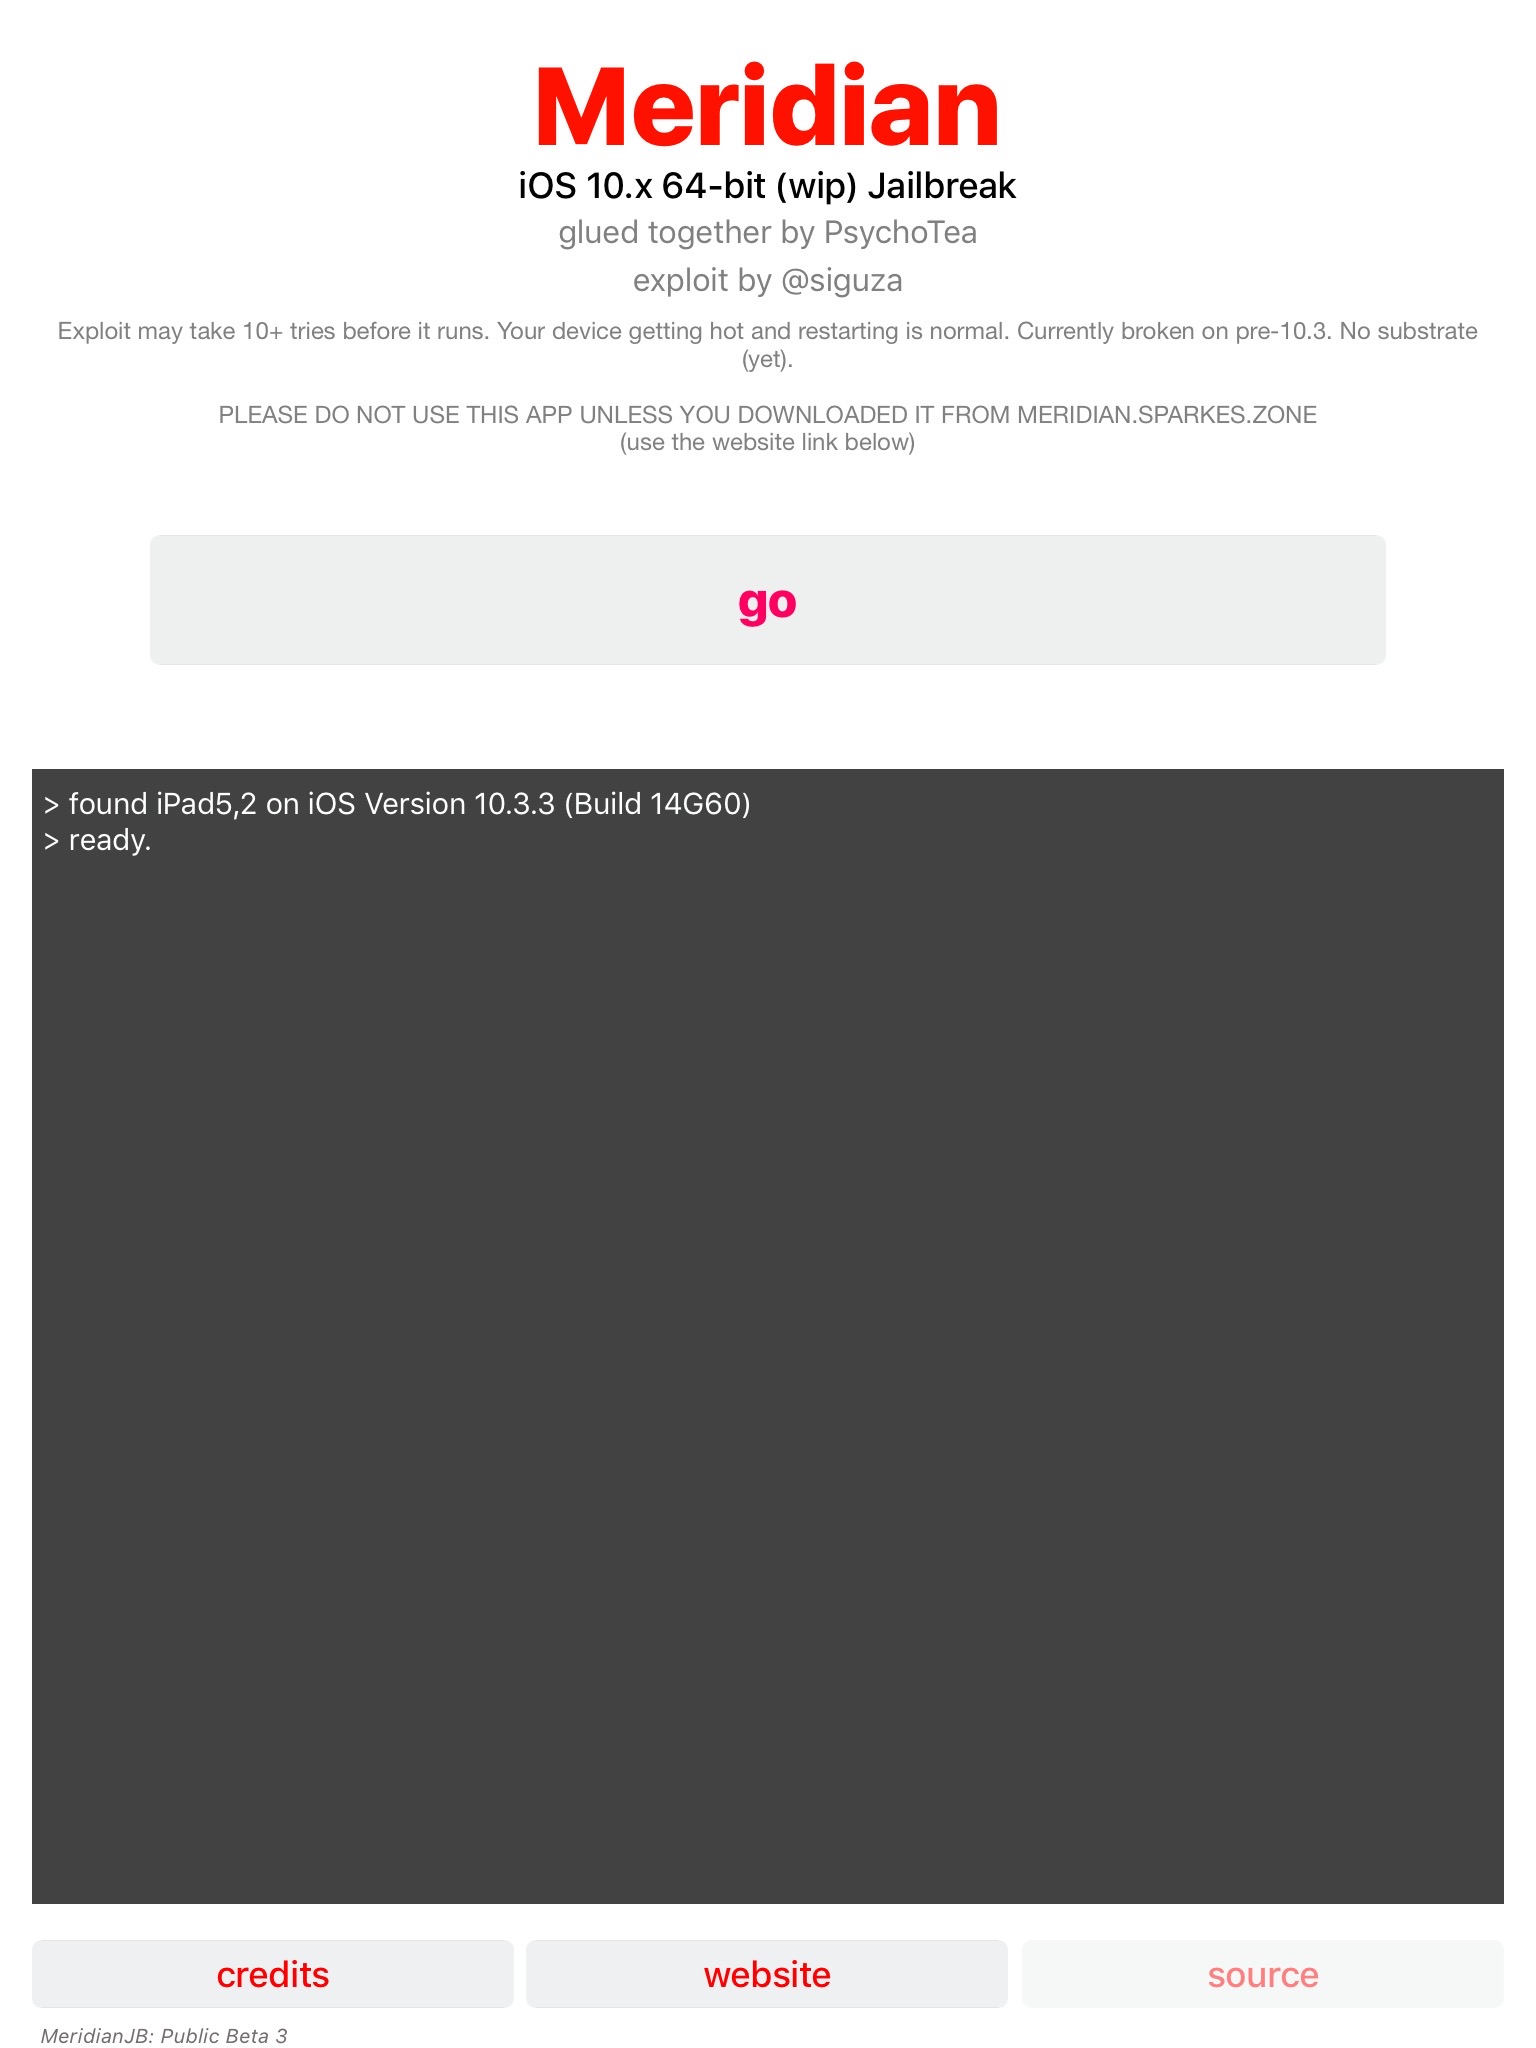
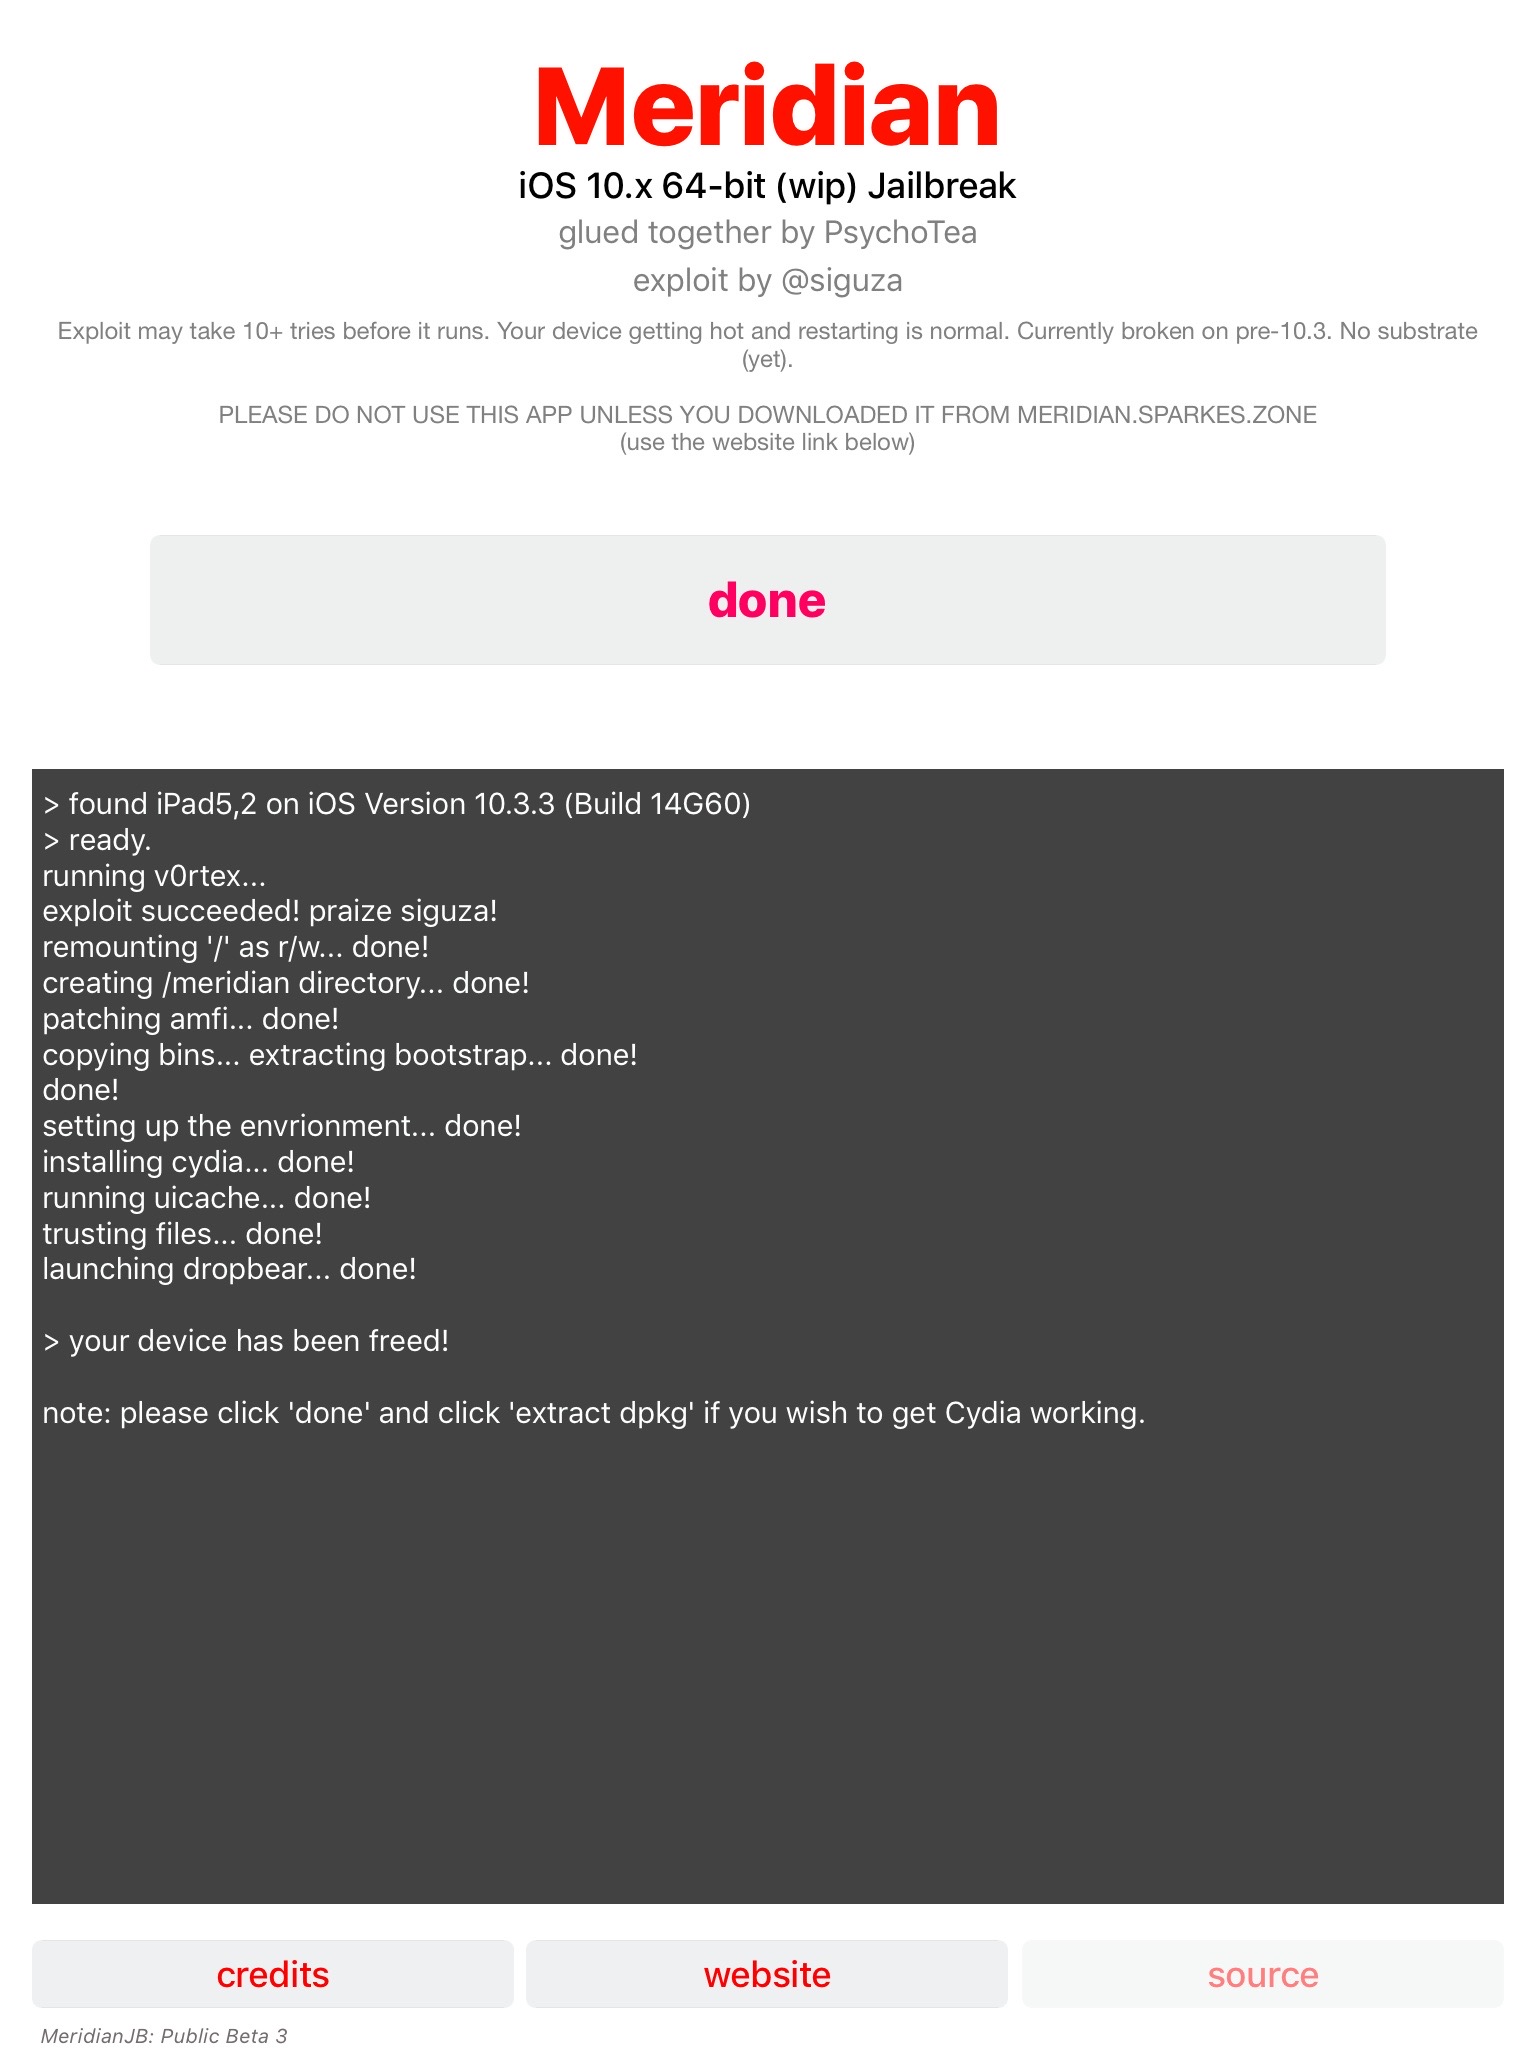
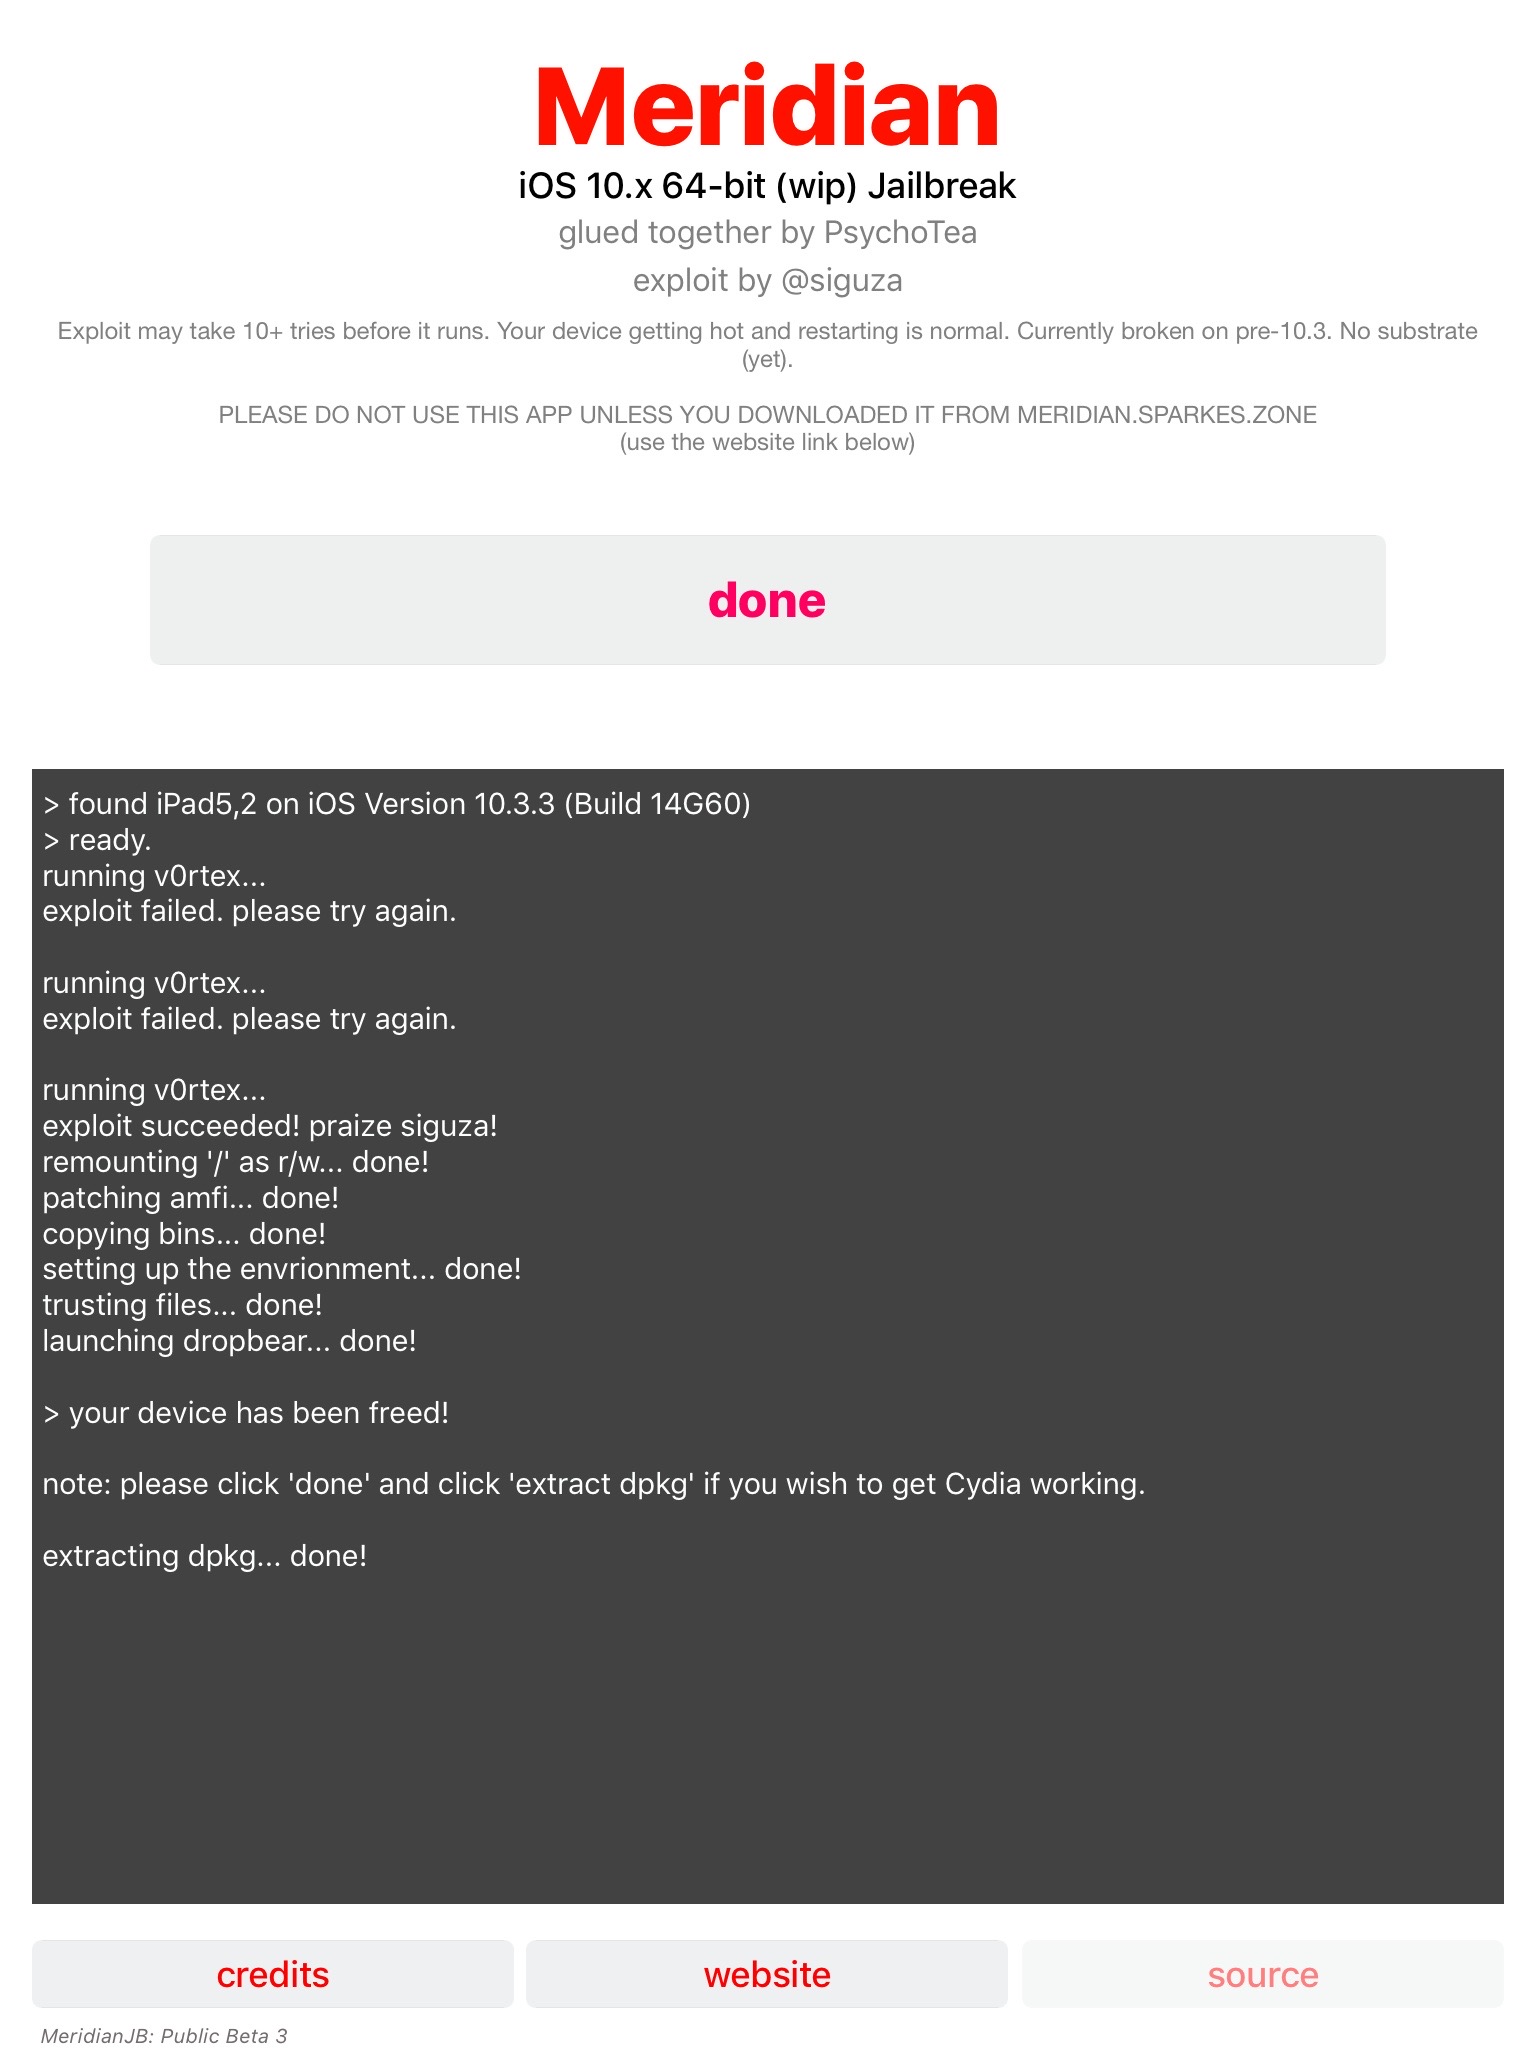
Let’s start with an iPad Mini on iOS 10.3.3 using the Meridian Jailbreak. The jailbreak app installation process was easy, it was actually exploiting the device which took some patience. As it states in the app, it may take up to 10 times. It took me three times the first time and six times in my second effort.

Next step is to SSH into the device. This was also a bit frustrating – part of it because I didn’t read the FAQ and part because the SSH software installed on the device is not very stable.

First off the SSH port used is on 2222, not the normal 22 so be aware of that if you use iproxy like myself – you need to use the command ‘iproxy 2222 4242 (or some other port number) instead of ‘iproxy 22 2222’.

Second is the SSH software used, dropbear. I had serious issues attempting to SSH into this device. Sometimes it worked, sometimes it refused the connection. Just keep trying is my solution – it will eventually work.

Finally, once you are in be sure to change the passwords for the ‘root’ and ‘mobile’ accounts by using the command ‘passwd root’ and ‘passwd mobile’ (see the screen shot below in the next section).

To image the device you can use a modified version of the command that I used in my previous blog article (assuming you are using iproxy  for USB tethering – modify as needed if not).

ssh –p 4242 root@127.0.0.1 '/meridian/bins/tar –cf - /' > ios_physical_logical_dump.tar

This jailbreak (as well as LiberiOS) are installing their own set of binaries which include some normal Unix utilities not installed on iOS. The tar command is in a different directory than what is normally used therefore it may not work to just use ‘tar’, instead point it to the one Meridian put on the device.

Another item you may have noticed that has changed with the command above is that I’m doing a ‘physical logical’ acquisition of the entire device using from the root directory or ‘/’. Previously I would capture the system partition as a full dd image using /dev/disk0s1s1, however something with these newer operating systems is limiting my access to it. Best guess at this point is that it’s an APFS thing ¯\_(ツ)_/¯ . Shown below doing a simple 'xxd' to view the partition is not permitted as root, this also goes for 'dd' and other utilities.

While this makes me a bit sad, I can still grab a logical copy of the files on the system and data partitions in one shot by using the command above. I did have some issues with the tar command exiting and eventually just had to assume I had all the files just on the size of the tar bundle so keep an eye on it.


Next up is an iPhone on iOS 11.1.2 using LiberiOS. Installation was just like Meridian – quick, easy, and flawfless.

This jailbreak was less quirky. As with the other jailbreak you should change the password for the 'root' and 'mobile' account immediately. This jailbreak provides the following instructions when first SSH'ed into. I highly reccomend running the export command shown below.

I was able to run the same command to procure a ‘physical logical’ acquisition of the device with a slight change because of where LiberiOS puts the tar utility. Once run you might get a few errors due to files being ignored or not permitted to be captured by 'tar'. This is normal.

ssh –p 4242 root@127.0.0.1 '/jb/usr/bin/tar –cf - /' > ios_physical_logical_dump.tar

Enjoy the new jailbreaks and may your forensic research and acquisitions be fruitful! I would also like to give a big THANK YOU to everyone who worked and contributed to these jailbreaks - they really do help with forensic research!

Script Update - Mac MRU Parser v1.5 - Added Volume Analysis Support and Other Stuff!

Get the script here!

Added volume analysis support for the following plists. These are not really MRUs but it could be damn useful to gather this info.

  • Sidebar List plist [10.12-] - /Users/<username>/Library/Preferences/com.apple.sidebarlists.plist
  • Favorite Volumes SFL2 - [10.13+] /Users/<username>/Library/Application Support/com.apple.sharedfilelist/com.apple.LSSharedFileList.FavoriteVolumes.sfl2
  • Finder Plist - /Users/<username>/Library/Preferences/com.apple.finder.plist
    • I was parsing FXRecentFolders Key, I've added FXDesktopVolumePositions Key
    • FXDesktopVolumePositions has a volume creation timestamp embedded into the "file" name for the volume (highlight in yellow below). This has been extracted and converted to human readable time (highlight in orange below).

Thanks to @4n68r for pointing out broke stuff (and for using the script!)

  • The ICNS Icon export function was also fixed.
  • Fixed support for some *.sfl2 files that were cranky and had no names.
  • Documentation/Spelling

Mount All the Things! – Mounting APFS and 4k Disk Images on macOS 10.13

Recently there has been some questions on the forums and Twitter as to how to mount forensic disk images that were captured from Mac system that implemented 4k block sizes. A few years ago, Mac systems started to use 4k blocks instead of 512 byte block sizes. This has caused some issues where you need to mount the image to do analysis without a major forensic suite. BlackBag wrote a good blog article on this last month however I hope to expand on it just a bit to include E01 files and FileVault encryption scenarios.

I will also detail how to mount the forensic disk images using newer APFS file system so analysts can start to do their thing while all the forensic tools catch up! APFS disk images already appear to use 4k block sizes as the default, at least on all my test systems. If you see otherwise, please let me know!

This article will try to provide some options to mount these images, however it cannot solve all the issues or combinations of disks/block sizes/host operating systems – it seems that you will have to upgrade to 10.13 at some point to solve many of these problems.

HFS+ 4k and FileVault Images

The following steps will bring you from a full HFS+ FileVault 4k disk image in EWF format to a mounted image using macOS 10.13. (If you have a raw (non-EWF) image, you can bypass steps 1 and 3.)

  1. $ sudo mkdir /Volumes/4k_image/

  2. $ sudo mkdir /Volumes/4k_mounted/

  3. $ sudo xmount --in ewf --out dmg 4k.E01 /Volumes/4k_image/

  4. $ hdiutil attach –nomount –blocksize 4096 /Volumes/4k_image/4k.dmg

  5. [Input Password in Prompt Window]

  6. $ diskutil cs list

  7. $ sudo mount_hfs –o rdonly,noexec,noowners /dev/disk# /Volumes/4k_mounted/

1. Create a mount point to put the xmount converted DMG image (converted from EWF format). [sudo is required when dealing with /Volumes/ since 10.12]

2. Create another mount point to put the mounted image on. This will act as the root volume for the mounted image.

3. Using xmount (sudo required) to convert from EWF (--in) to DMG (--out) format. DMG is selected here since it is very Mac friendly. Provide the E01 image (use E?? if using segments) and the converted image mount point created in Step 1. This could take a few seconds if the disk image is large. Theoretically you can use another mounting utility, I've tried ewfmount on 10.13 and ran into errors that I'm still investigating. Having trouble installing Xmount? Does it say OS X Fuse is not installed? Look in the comments section for a fix.

4. Using hdiutil, attach (but don’t yet mount) the DMG file created in Step 3. Using the hidden argument –blocksize we can specify 4096 (‘4k’ can also be used here). It is worth noting here that while hidden in 10.13 this option does not appear to exist in 10.12 versions of this utility. It is also is not detailed in the hdiutil man page. Gotta love hidden functionality! This will output a bunch of /dev/disk* options, however none of these are the ones you need thanks to CoreStorage.

5. If the image is FileVault encrypted a password window will appear, please put the password for the disk in here so it can be unlocked.

  • If you want to do this all via the command line (you rock!) you can pass –stdinpass to the hdiutil command in Step 4 where it will prompt you for the password.
  • You will then need to use ‘diskutil cs unlockVolume <LogicalVolumeGUID> ‘ after determining the Logical Volume GUID to use by using ‘diskutil cs list’. (Similar to Step 6) Note the Lock Status highlighted in the screenshots below.

6. Next use ‘diskutil cs list’ to determine which disk to using in Step 7. Determine which volume you will be performing analysis on, in the screenshot above it is /dev/disk6.  

7. Using mount_hfs (with sudo again) we can mount /dev/disk6 (the ‘#’ is just a variable used above, yours may be a different number) using a variety of options (you can choose your own, however I normally use read only, ignore ownership, and limit binary execution options. Also provide it the second mount point you created in Step 2.

If it all works out, congrats you now have a mounted image!

APFS Images

A similar approach can be used for new APFS disk images. Anyone who has tried to capture their disk images in 10.13 might have had a problem doing so due to System Integrity Protection (SIP). SIP is now protecting /dev and will likely make forensic acquisition and analysis more difficult if you happen to interact with /dev often. Easy fix – disable SIP. While not technically good for security purposes, it can be a general pain in the posterior to have on. To disable it, reboot into Recovery mode, open the Terminal and type ‘csrutil disable’ and restart the system. Yes, you can re-enable it later with ‘csrutil enable’.

  1. $ sudo mkdir /Volumes/apfs_image/
  2. $ sudo mkdir /Volumes/apfs_mounted/
  3. $ sudo xmount --in ewf --out dmg apfs.E01 /Volumes/apfs_image/
  4. $ hdiutil attach –nomount /Volumes/apfs_image/apfs.dmg
  5. $ diskutil ap list
  6. $ diskutil ap unlockVolume <Disk GUID> –nomount
  7. $ sudo mount_apfs –o rdonly,noexec,noowners /dev/disk# /Volumes/apfs_mounted/

Because it is so similar to the process above, my description of each step here will be limited. In Step 4 we do not need to use –blocksize as it just happens to work without it. In Step 5, instead of ‘diskutil cs list’ we use ‘diskutil ap list’ – APFS does not use CoreStorage (cs) and instead uses APFS containerization (ap). The ‘ap’ will also be used in Step 6. Step 7 uses mount_apfs instead of mount_hfs for obvious reasons and would be used on /dev/disk6s1 as shown in the example screenshot below.

References and Thank You’s

https://www.blackbagtech.com/blog/2017/10/05/apple-file-system-apfs-mac-forensic-imaging-analysis/

A big thanks to Ed and a “little birdy” for sanity checks and help!

Script Update - Mac MRU Parser - Spotlight Shortcuts & BLOB Parsing!

Get the script here!

Added in Spotlight Shortcuts

I've updated my macMRU.py script to parse the Spotlight Shortcuts plist file that I consider to be very MRU-like. This plist file contains what the user typed into the Spotlight search window, what they clicked on, and when this all occurred. You can find artifacts of application usage, documents, emails, photos, etc.

Bookmark and Alias BLOB Parsing

The second part of the update (and probably the most requested!) was to add in arguments to allow the analyst to see the parse out the Bookmark and Alias BLOB data. Previously the script only had an option to show the BLOB hexdump. Using mac_alias [download here], the script can now parse these BLOBs. This comes with a caveat, this script relies on the documented structures by others (with a few minor changes by my own research). These have not been officially documented by Apple therefore YMMV. Many of us are still researching these, hopefully this script will help the process! This update provides three new arguments:

  • --blob_hex = This is the same as what --blob was before. Just a hexdump of the BLOB data.
  • --blob_parse_raw = This shows the raw output from mac_alias, not exactly the easiest to read but good for debugging.
  • --blob_parse_human = This shows the pieces of the BLOBs in a (mostly) human-friendly (example below).

I want to say thank you to a few folks that allowed these additions to be made:

  • Alastair Houghton & Wim Lewis - For mac_alias and the reversing the Alias/Bookmark structures. I took a shot at it years ago and gave up, really appreciate someone else's effort!
  • Phill Moore of thisweekin4n6.com - You'll notice some support for legacy keys in the com.apple.recentitems.plist have also been added in this update thanks to Phil and his oddly old MRUs files! :) I also appreciate his testing of this tool on Windows also. (Sorry Phil, didn't get a chance to test it on Windows yet!) 
  • Shout out to Patrick Olsen for his work on Alias V3 structures. Unfortunately I did not get to use his research - turns out V3 Alias BLOBs do not get used in any of the MRUs that I'm parsing in this script (they are all V2)! Maybe in the future!